Sunday, November 30, 2014

vintage chair upgrade


When my father in law gave me this 100 year old chair I was so excited!  I knew I wanted to upgrade it but I loved the natural antique look.  So I decided to cover the cushion with a modern fabric. I love mixing vintage with modern. The best thing about this is it still has the antique look and if I want to change the fabric I can. 

XOXO Lacie 

Saturday, November 22, 2014

Refurbished kitchen table

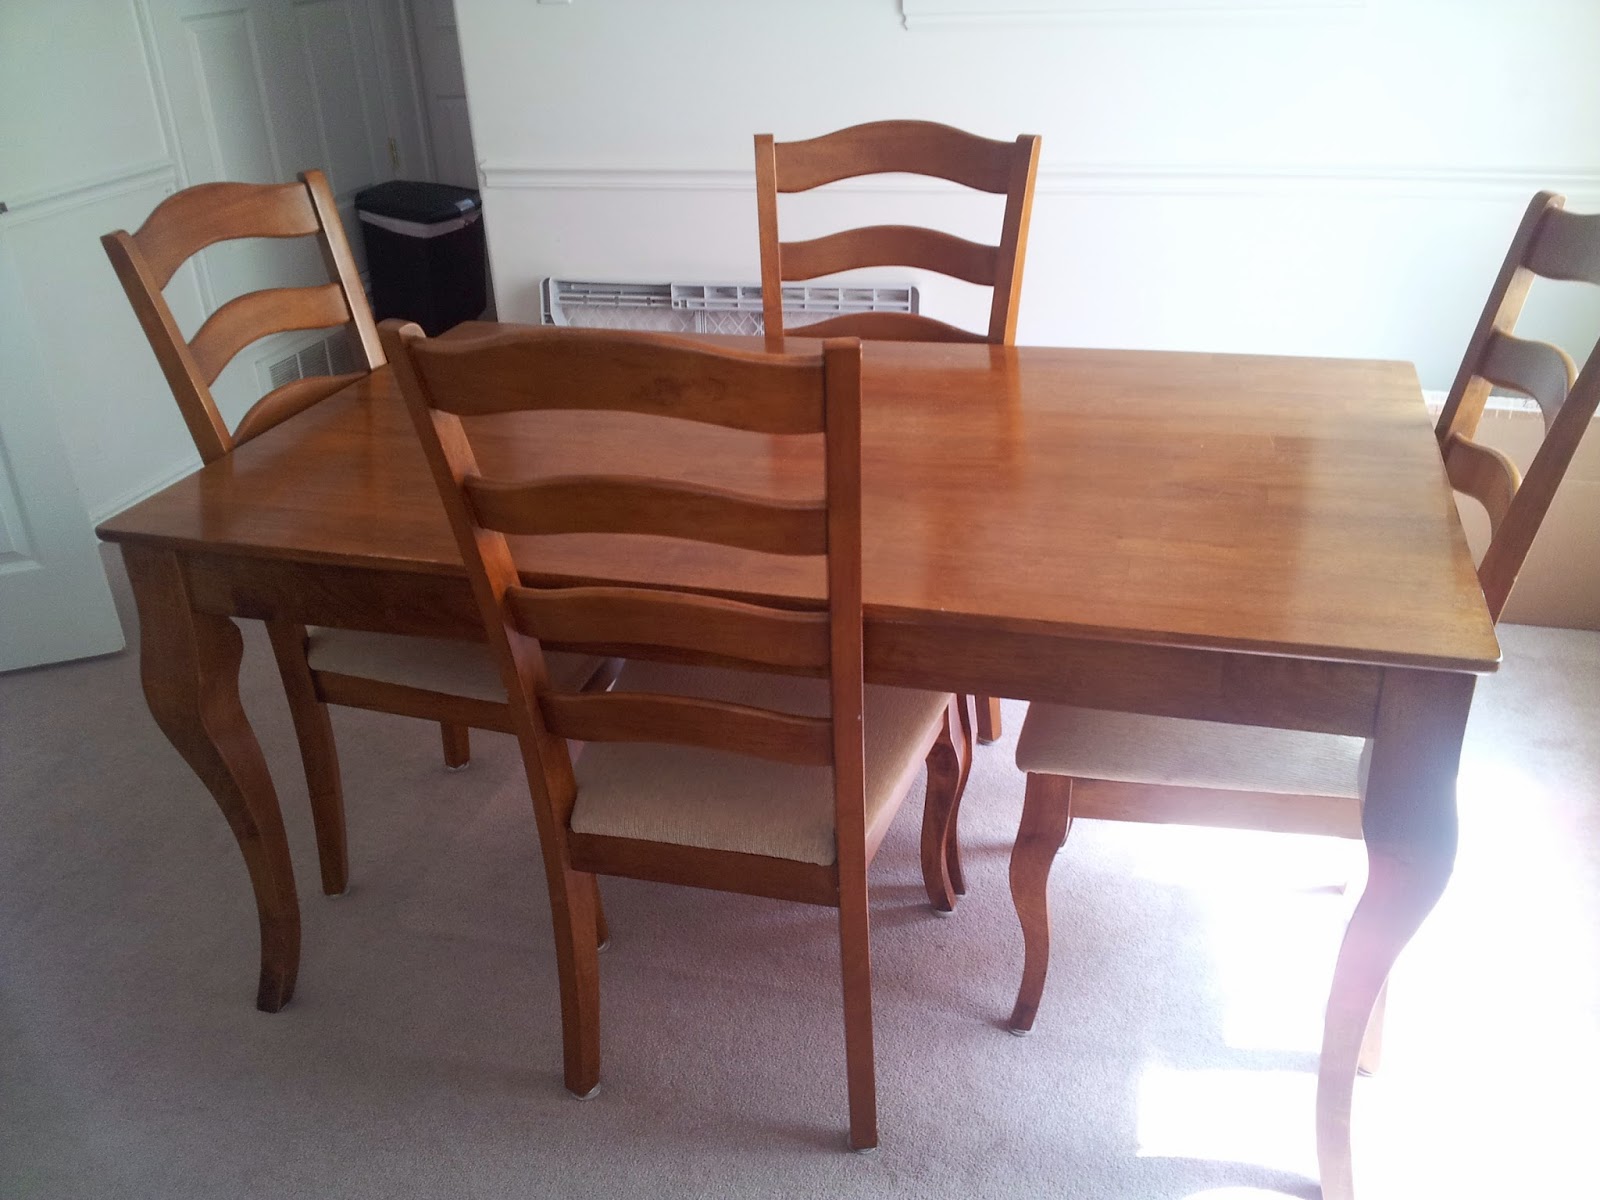
When we moved into our house last November our friends and family were always offering up their old furniture.  Of course I couldn't turn any of it away. I love redoing things and giving them a complete new look. Especially when it's free! Here is a kitchen table a sweet friend offered to me when they upgraded theirs.
This was after I sanded it. It had a little more of the honey oak color to it.... Sanding.... Not one of my favorite things.

The stain I used was called Kona and I used an off white paint. Once that was dry I distressed the white part and used the same color of stain over it. I'm super pleased with the way it turned out! What do you think?


Our Christmas center peice on our table!

P.S. I'm still looking for the leaf that fits inside this table. If you happen to think you have the match and want to offer it up I would love you forever and ever.

XOXO Lacie

Tuesday, November 18, 2014

growth chart diy


I have been seeing these cute growth charts everywhere and have been wanting one. I just couldn't justify paying the prices they've been asking. Especially when I knew I could do it myself for a heck of a lot cheaper. And I'm going to share it with all of you! 

Run to Home Depot and buy yourself a cheap board. I got this one for a whopping 7 bucks. Paint it whatever color you desire. 

For the background numbers I used a stain. Print off big numbers on separate sheets of paper. Position and tape them to your board. 

Take a sharp edge and trace your numbers onto your board. You need to press hard enough so you can see it when you remove the paper. Once you've traced all your numbers your going to use a stain to color in your numbers. I used a small brush but they make stain pens that would make this very easy. Remember that stain spreads so don't trace right along the edge. 

After the stain has dried you can add your numbers and tallys. For the numbers I used mailbox stickers from Walmart. Only cost me about 4 bucks! 

There you have it.  Your very own growth chart all for barely over $10. Can't beat that!


Side note: I started my measurements 5 inches from the floor because I didn't want it to rest on the floor and I wanted the chart to go past 6 ft. If your going to rest it on the floor you can do regular measurements and the board will be exactly 6 ft. 

XOXO Lacie 

Thursday, November 13, 2014

Wood pallet diy

I am doing everything I can to keep from putting my Christmas decorations up. I decorated for Thanksgiving but, like everyone else I'm ready to go strait into Christmas. We'll see if I can make it until this weekend.  In the meantime this project kept me busy for the time being. Originally I wanted to put a collage up on this wall but when I found this smaller pallet at the thrift store along with the yellow berry wreath I knew I had just the spot for it. 

All I did was use a little stain on the pallet to darken the corners and added greenery to the wreath to make it fuller. I'm loving the way it turned out. And I love wreaths! I think I have 7 in my home. I just love the warmth they add. What do you think?

XOXO Lacie

Tuesday, November 11, 2014

Minky Couture

Need a Christmas gift idea??? Well I have the perfect gift for you!! It's from Minky Couture.  They make the softest blankets ever! I own 7 blankets, 2 crib sheets and like 8 pillows from them.  I absolutely had an addiction with this company last year.  My husband told me I better not go crazy again this Christmas :)... I couldn't promise him that ;).. I gave them out for Christmas gifts also.  Everyone that received them absolutely loves them.  You definitely need to check out this company!! Here is the link Softminkyblankets.com  I know you will enjoy them as much as my family does.

XOXO, Brooke

Monday, November 10, 2014

Annie Sloan Chalk Paint

Before

After


So, I just have to talk about how much I LOVE this product!!!!! I'm not the type of person that likes to paint furniture.  I think it takes WAY to long!!!! And I do not have the patience for it, because you normally have to prime it and sand it. But..... With Annie Sloan Chalk Paint you don't have to prime it or sand it... And it looks just as good as if you would have.. I'm not a professional at all, but I was pretty excited how my table turned out. I'm still working on the table and need to go find fabric to go on the seats.. But anyways, if your like me and don't like to do all the steps of actually painting your furniture...GO BUY ANNIE SLOAN CHALK PAINT!! I promise you will love it!! I've even been thinking about doing my kitchen cabinets with it... You can find the chalk paint at Boutiques. The best way is to google it.  I was surprised how many sell it around my area..

XOXO,
Brooke


Saturday, November 8, 2014

Cookie stamping

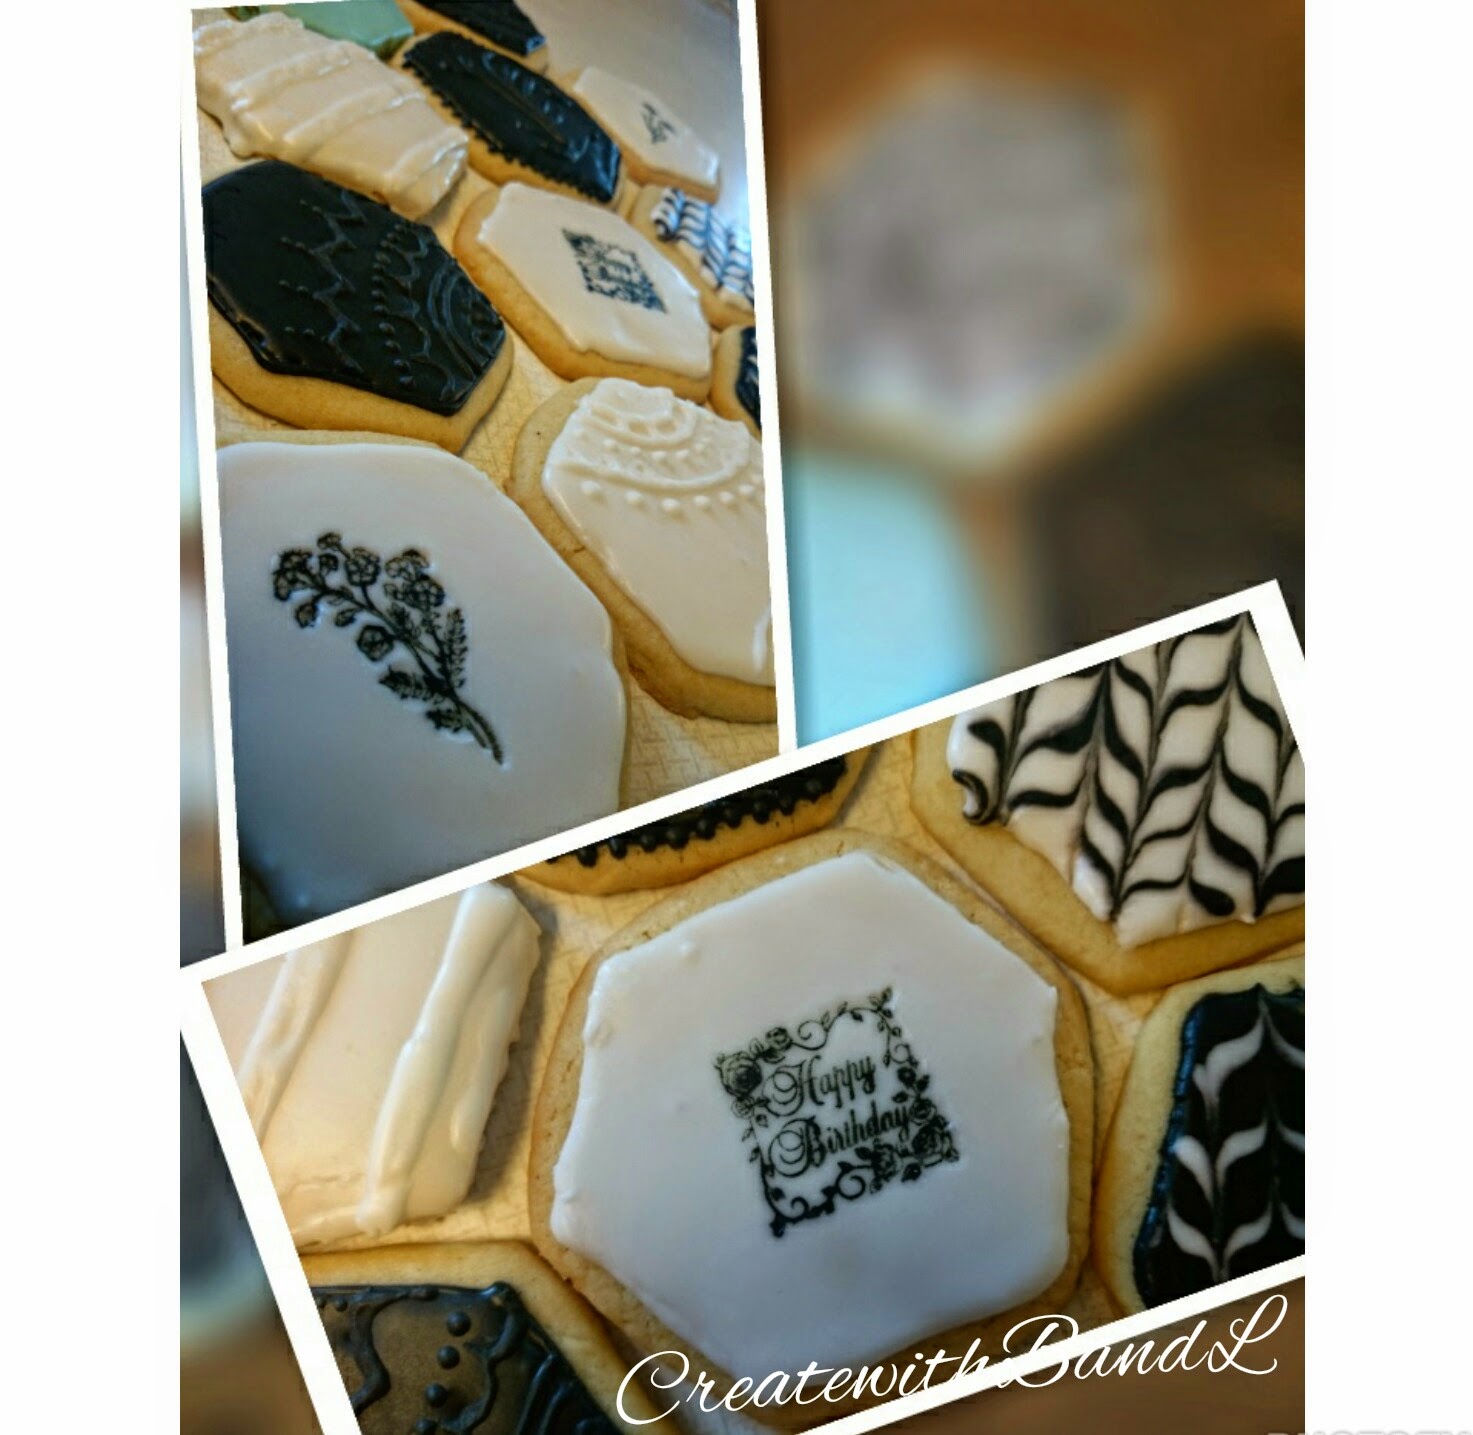
Ok this is fun! I remember when I was little and stamps were all the rage. My mom had bins full of them. Then they kinda just went away. Thankfully she never got rid of them . Stamps are making a come back with a twist! And it's SO fun! We have a few birthdays going on this weekend and I thought these made a cute personalized treat.


What you need:
Rubber stamps (call your mommas)
Food coloring
Frosted cookies (royal icing)
Qtip


Frost your cookies with royal icing. Let them dry completely threw. I let them dry over night to be sure. We have a post about how to make royal icing here


Now you're ready to stamp. Take your food coloring (they have pens that you could use too) and drop a few drops onto your Qtip and run it over the rubber design of your stamp (cleaned obviously). Quickly but gently press onto your cookie.


Just a tip... The stamps work better if they are smaller rather than if you use a long or larger stamp. I hope you have as much fun with this as I did! 


XOXO Lacie 

Thursday, November 6, 2014

Gluten Free Sugar Cookies

Here is a cute decorating idea for Christmas!! I used a gingerbread man cookie cutter and turned it around!! Also, these are gluten free cookies.  I know there are a lot of people out there with wheat allergy's, so I thought it would be fun to do a gluten free recipe.  Hope you enjoy!!

Ingredients for Gluten Free Sugar Cookies:

-3/4 cup butter
-3/4 cup granulated sugar
-1 large egg
-1 teaspoon almond extract
-2 teaspoons vanilla extract
-2 1/4 cups of brown rice flour
-1/2 teaspoon baking powder

Directions:


In a large bowl, beat butter until smooth. Add sugar and beat on high until fluffy. Add egg, almond extract, and vanilla extract and beat on high for 1-2 minutes.  Add brown rice flour (mixing in approx. 1/2 cup at a time) and baking powder. Beat on slow until all mixed together.

Roll out the dough, then put into the refrigerator for at least 4 hours (can stay in the refrigerator for 1 day if needed). 

Once it has been chilled, roll out to desired thickness (1/4 of an inch thick is optimal). Cut into desired shapes with a cookie cutter. Bake at 350 degrees F for 7-10 minutes. 


Ingredients for the Royal Icing:


-1 bag powdered sugar
-1/2 teaspoon cream of tartar
-11 Tablespoons pasteurized egg whites (can be replaced with 5 Tablespoons of meringue powder)
-1/4 teaspoon almond extract
-1/4 teaspoon coconut extract

Directions:

Mix powdered sugar and cream of tartar together in a bowl with an electric mixer.  Stir in the egg whites by hand.  When mixed well, beat with an electric mixer on low speed for 30 seconds.  Turn the mixer to medium-high speed and beat for 1-2 minutes, until icing is very white and silky. Pour in extracts and food coloring as desired. Mix until all blended (try not to over beat.)  


XOXO, Brooke

Don't forget to pin for later (at the bottom of this page.) :) :) :) 

Wednesday, November 5, 2014

Wood pumpkins

Wood pumpkins 


I love decorations that can carry on to the next holiday.  That's why these pumpkins are one of my favorites for Fall. Especially since Thanksgiving decor seems to get skipped over. Last year my mom cut down a few of her trees so she had tons of scrap wood lying around. We couldn't just let it go to waste.  Naturally, a Pinterest search was a must. And it didn't disappoint (does it ever)? It was such a cheap easy project. Can't beat that.

What you need:
Wood cut into different lengths
Small twigs for the stems 
Orange paint 
Ribbon/wire/leaves/berries (decoration) 

Cut your wood into different lengths and drill a small hole in the top. That is where you will put your twig to create a stem. Next you will paint the wood. I mixed my paint with water because I wanted a little more of a used worn look. Then hot glue the twig in the hole in top and wrap with Ribbon, string or berries. Thanksgiving won't be forgotten in this home! 

XOXO Lacie